Essential Steps on How to Prepare Your Home for Professional Painters
If you're planning on hiring professional painters to give your home a fresh coat of paint, it's important to properly prepare your home before they arrive. This not only ensures that the painting process goes smoothly, but also helps to achieve the best possible results.
In this comprehensive guide, we will outline the essential steps you need to take in order to prep your home for professional painters. Whether you live in Edinburgh, UK or anywhere else in the world where English is spoken, these tips can be applied universally.
So let's get started and make sure your home is ready for its new look!
What Is Mean By Prepping Your Home
Before we delve into the steps of prepping your home, it's important to understand what this term means. In simple terms, prepping your home refers to getting it ready for painting. This involves taking various measures to ensure that the surfaces are clean, smooth and in good condition before the painters arrive.
The purpose of prepping is to provide a solid foundation for the paint to adhere to and achieve a professional finish. It also helps minimize any potential damage or issues during and after the painting process.
The Importance of Preparing Your Home for Professional Painters

Understanding the significance of properly preparing your home for professional painters is essential. Here’s why this step is crucial:
First, preparation safeguards your belongings and surfaces from potential damage. This includes moving furniture, covering it with protective sheets, securing your floors, and removing any fragile or valuable items.
Second, proper preparation ensures optimal paint adhesion. Without adequate prep work, the paint may fail to bond correctly, increasing the likelihood of peeling or requiring expensive touch-ups or repainting.
Third, it contributes to achieving a smooth, professional-quality finish. Cracks, imperfections, and rough areas left unaddressed can detract from the final result. Sanding, filling holes, and smoothing surfaces are vital to creating an even base for painting.
Lastly, preparation helps protect surfaces from long-term damage. For instance, cleaning and priming an exterior wall can prevent issues such as moisture intrusion or mold growth, which could compromise the structure beneath the paint.
Essential Steps On How to Prepare Your Surfaces for Painting

Preparing surfaces before painting is a crucial step that many people tend to overlook or rush through. However, taking the time to properly prepare your surfaces can make all the difference in achieving a professional-looking paint job that will last.
Here are some essential steps on how to prepare your surfaces for painting:
Clean the Surface
Before starting any painting project, it's essential to thoroughly clean the surface to ensure optimal adhesion.
Use a damp cloth, sponge, or mild detergent to remove dust, dirt, grease, or any stains. Walls with heavy grime may require a stronger cleaning solution or a degreaser. For exterior surfaces, consider using a pressure washer to eliminate debris effectively. Ensure the surface is completely dry before proceeding.
This step not only ensures better paint application but also prevents imperfections, such as uneven texture. Neglecting to clean the surface can lead to peeling paint or a finish that doesn’t adhere evenly.
Patch Any Holes or Imperfections
Inspect the surface for holes, cracks, or other imperfections that might affect the final paint finish. Use spackling compound or a filler to patch smaller holes and gaps, while larger damage may require a repair kit or professional assistance.
Once the filler dries, use a putty knife to scrape away excess material and create a smooth finish. Properly addressing these flaws ensures the paint will apply evenly, leading to a flawless look.
Skipping this step might leave your paint job looking uneven or unattractive, as the imperfections will remain visible, even under multiple coats of paint.
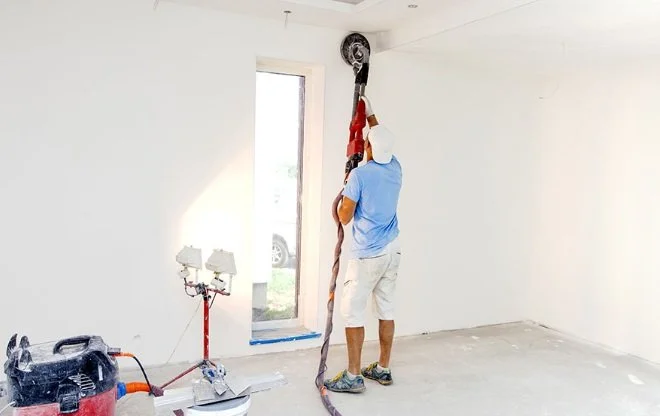
Sand the Surface
Sanding is a critical step in preparing surfaces for painting, as it creates a smooth and even texture for optimal paint adhesion. Use medium-grit sandpaper to smooth out rough areas, remove peeling paint, or even out previous coats of paint.
For glossy surfaces, light sanding is crucial to help the new paint layer bond properly. Pay attention to edges and corners where imperfections may hide.
Once you finish sanding, thoroughly clean the surface again to remove dust and particles. Skipping sanding can lead to an uneven finish or poor adhesion, resulting in a less durable paint job.
Apply Primer
Priming the surface is essential for achieving a long-lasting and professional paint finish. A primer creates a uniform base that allows the paint to adhere evenly and enhances the paint’s colour and durability.
It also helps to seal porous surfaces and prevent stains or blemishes from bleeding through. Choose a primer suitable for your specific surface type—whether wood, drywall, or metal. Apply it evenly using a brush or roller, following the manufacturer’s directions.
Allow the primer to dry completely before painting. Proper priming ensures the topcoat will look vibrant and stay intact for years to come.
Tape and Protect Surrounding Areas
Before you begin painting, take time to tape and protect surrounding areas to avoid accidental splatters and drips.
Use painter’s tape to cover edges, trim, and areas where different colours meet. Securely press the tape to ensure clean lines. For floors, furniture, and other surfaces you don’t want painted, use drop cloths or plastic sheets. This step reduces cleanup time and ensures a polished look once the project is complete.
Neglecting to protect these areas can result in messy edges, unwanted paint spots, and additional work after the painting process is finished.
So these are the top steps to consider for a successful painting project. Remember to choose the right type of paint, properly prepare surfaces, invest in quality tools, and protect surrounding areas.
Tips For A Successful Painting Project
When it comes to painting, there are a few key steps that can help ensure a successful and professional-looking end result. Here are some additional tips to consider for your next painting project:
Choose the right type of paint: Different types of paint have different qualities and should be chosen based on the surface you will be painting and the desired finish. For example, glossy paints work well in kitchens and bathrooms as they are easy to clean, while flat or matte paints are better suited for walls with imperfections.
Invest in quality tools: It may be tempting to use old or cheap brushes and rollers for your painting project, but investing in high-quality tools can make a big difference in the final result. Good quality tools will help the paint go on smoothly and evenly, saving you time and effort in the long run.
Prep your surfaces: Before starting to paint, it is important to properly prep your surfaces to ensure a smooth finish. This may include cleaning, sanding, or priming depending on the condition of the surface. Taking the time to prep will make a significant difference in how well the paint adheres and how long it lasts.
Use painter’s tape: Painter’s tape is an essential tool for achieving clean lines and avoiding any unwanted drips or smudges while painting. Make sure to apply it carefully and remove it at the right time – too soon and it may peel off paint, too late and it may cause the paint to bleed. Use a putty knife or credit card to smooth out any air bubbles and ensure a tight seal along the edges.
Protect your furniture and floors: No matter how careful you are, accidents can happen while painting. Be sure to cover any furniture with drop cloths or plastic sheets to protect them from drips or spills. You should also lay down a drop cloth on the floor to catch any drips that may fall while painting.
With these tips in mind, you can confidently tackle your painting project and achieve professional-looking results. Remember to take your time, prepare properly, and use quality materials for the best outcome.
Why Choose Capital Painters for Your Edinburgh Painting Needs?

Hey there! Looking for friendly, local experts to handle your painting and decorating? You’ve come to the right place. At Capital Painters and Decorators in Edinburgh, we’re here to help with everything from staircase decoration to surface prep and restoration.
We get it—your space should feel warm, inviting, and totally you. That’s why our skilled team takes pride in delivering top-notch interior and exterior painting services to make your home or business shine. With years of experience, we love transforming spaces—and we think you’ll love the results too.
But we’re not just about great painting. We’re all about making the process smooth and enjoyable, building strong relationships, and making sure you’re thrilled with the final product.
Give us a call today at 07517 002241 to chat about your ideas and get a free estimate. Let’s bring your vision to life and create a space you’ll love. We can’t wait to get started!
FAQs
Should I remove wall hangings before interior and exterior painting?
Yes, all wall hangings should be taken down before interior and exterior painting begins. This gives painters full access to the walls and protects your decorations from dust, damage, and accidental paint splatters during the professional painting process.
What should I do with soft furnishings before a new paint job?
Soft furnishings like cushions, curtains, and rugs should be removed or properly covered. This is important for both interior and exterior painting projects, as it helps avoid contact with dust, debris, or paint splatters from the new paint job.
Is it necessary to scrape off old paint or loose paint?
Yes, removing old paint or loose paint is a key prep step for a smooth finish. Whether it's interior or exterior painting, professional painting teams will usually handle this, but clearing obvious flakes in advance can speed up the process.
Should I take off light switch covers before painting?
Definitely. Removing light switch covers and outlet plates helps achieve cleaner edges and prevents them from getting covered in paint splatters. It’s a simple way to prepare your home for a new paint job done by a professional painting crew.
Conclusion
Preparing your home for professional painters is key to ensuring a smooth and high-quality painting experience. Cleaning, patching, sanding, priming, and protecting furniture are all crucial steps for a flawless finish. Proper prep improves paint adhesion, boosts durability, protects your belongings, and helps avoid costly mistakes.
By thoroughly preparing your home, you allow painters to focus on what they do best—delivering stunning, long-lasting results. Whether you're refreshing a single room or your entire property, smart preparation ensures success.
If you're in Edinburgh and need skilled, reliable painters, Capital Painters & Decorators is here to help. Our expert team transforms residential and commercial spaces with precision and care. From interiors to exteriors, we deliver every project to the highest standard. Contact us today for a free consultation and let us bring your vision to life.